

Key Takeaways
Why Sequence Is the Most Underrated Part of a Kitchen Remodel
Most homeowners spend months choosing cabinet finishes and countertop materials — and far less time thinking about the order in which work gets done. That imbalance is expensive. A remodel executed in the wrong sequence almost always means paying a trade twice: once to do the work and once to undo what another trade covered up.
Sequencing matters because each phase creates the conditions the next phase depends on. Rough-in plumbing has to be in the wall before drywall goes up. Cabinets have to be level and secured before countertops can be templated. Flooring decisions affect cabinet height. Every step has a predecessor. Understanding that chain — and scheduling around it deliberately — is the difference between a smooth six-week project and a three-month ordeal.
For a broader look at renovation costs before you finalize your scope, see what actually drives kitchen renovation budgets.
~35%
Budget overruns caused by poor sequencing
Industry trade sources suggest roughly a third of kitchen renovation cost overruns stem from out-of-order work requiring rework or re-inspection.
6–12 weeks
Typical full kitchen remodel timeline
According to general contractor estimates, a mid-size kitchen gut renovation typically spans six to twelve weeks from demo to final punch-out.
3–5 days
Average rough-in inspection wait time
Municipal building departments commonly take three to five business days to schedule a rough-in inspection, making early permit applications critical.
Phase 1: Planning, Permits, and Pre-Work
No physical work should start before the design is locked and permits are applied for. This phase includes finalizing the layout, selecting all materials with confirmed lead times, and submitting permit applications to your local building department.
Key tasks in this phase:
- Finalize cabinet layout with confirmed measurements
- Select countertop material and note fabrication lead time (stone slabs often take 2–3 weeks after templating)
- Order cabinets and appliances immediately after design approval
- Submit permit applications for electrical, plumbing, and any structural changes
- Hire and schedule all trades with confirmed start dates
Never Skip the Permit Step
Unpermitted electrical, plumbing, or structural work can create serious problems when you sell your home — inspectors and buyers' agents routinely flag it. In some jurisdictions, unpermitted work must be demolished and redone at the homeowner's expense. Always pull the required permits and schedule inspections at each required phase.
If your project involves removing a wall to create an open layout, review the trade-offs of open-plan kitchens before committing to that structural change.
Order your cabinets and appliances the moment your design is finalized — lead times of 6 to 12 weeks are common, and a delayed delivery will stall every trade that follows.
Cabinet and appliance lead times are the single most common cause of project delays; locking in orders early keeps the schedule intact.
Walk through the space with your electrician before demo and mark outlet, switch, and lighting locations directly on the studs so there is zero ambiguity during rough-in.
Miscommunications about fixture placement are frequently discovered only after drywall is hung, requiring costly cuts and patches.
Phase 2: Demolition and Structural Work
Once permits are in hand and a dumpster or haul-away service is arranged, demolition can begin. Work from the top down: remove upper cabinets, then lower cabinets, then appliances, then flooring if it's being replaced.
Structural work — wall removal, beam installation, subfloor repairs — must be completed and inspected before any rough-in trade begins. A structural framing inspection is typically required before walls are insulated or closed.
Wall Removal May Involve Hidden Hazards
Before demolishing any wall, have a licensed contractor determine whether it is load-bearing. Homes built before 1980 may also contain asbestos in drywall compound or lead paint — both require professional testing and, if present, certified abatement before any demo work proceeds. Do not assume a wall is safe to remove without a professional assessment.
After demo, this is also the right moment to address any subfloor damage, pest evidence, or mold discovered behind old cabinets. Fixing these issues now costs far less than finding them after new flooring is installed.
Phase 3: Rough-In Trades — Electrical, Plumbing, and HVAC
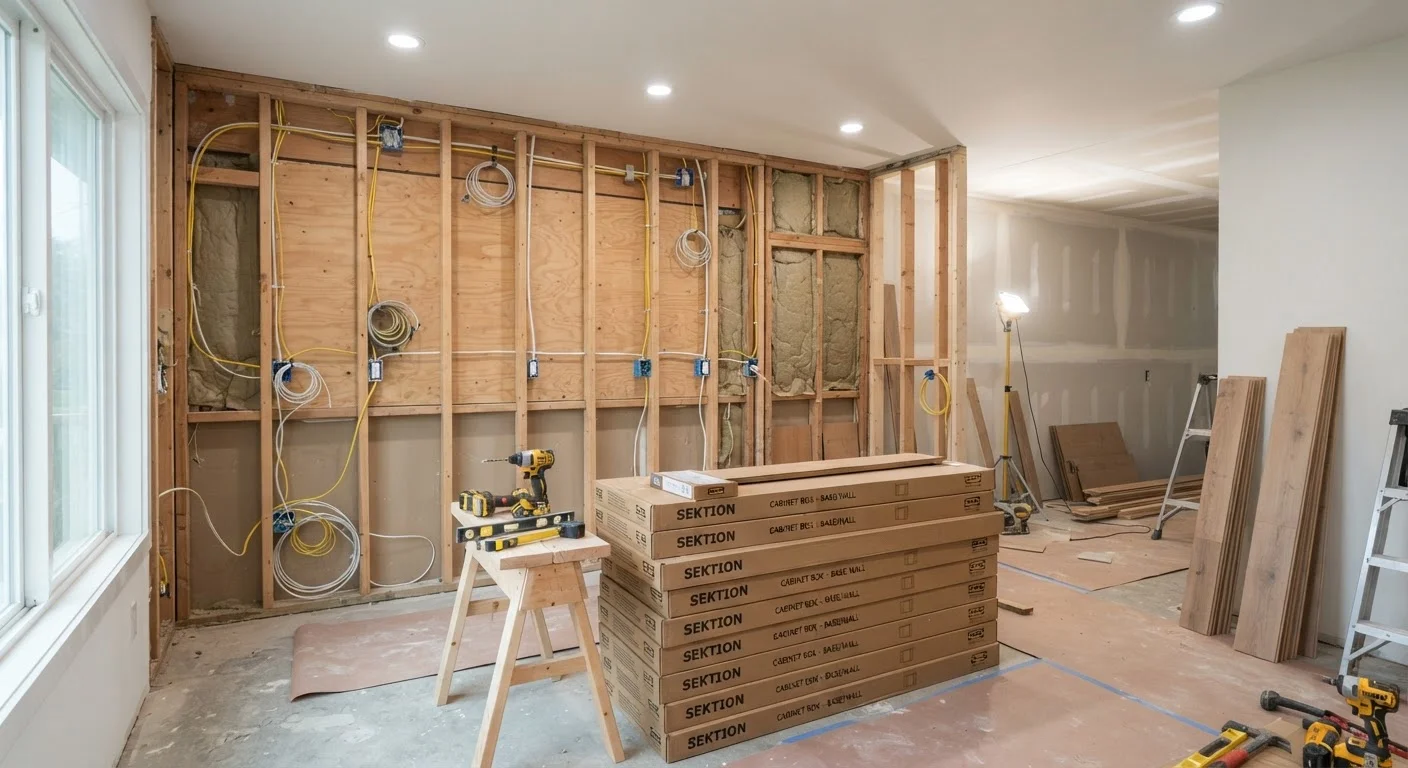
This is the most sequencing-sensitive phase of the entire project. Electrical, plumbing, and HVAC (heating, ventilation, air conditioning) rough-in work all happen while walls are open — and all three must be completed and pass inspection before drywall is installed.
The general order within this phase:
- Plumbing rough-in: New drain lines and supply lines are run and pressure-tested.
- HVAC rough-in: Ductwork is modified or extended for any range hood venting, added supply registers, or exhaust fans.
- Electrical rough-in: New circuits for the refrigerator, dishwasher, microwave, and GFCI (ground fault circuit interrupter) outlets are run. Lighting rough-in for recessed fixtures is completed.
- Rough-in inspection: A municipal inspector signs off on all open-wall work before insulation or drywall proceeds.
Do not rush the inspection step. Most jurisdictions allow 3–5 business days for scheduling — factor this wait into your project timeline from the start.
Phase 4: Drywall, Flooring, and Cabinets
After rough-in inspection approval, the kitchen starts to look like a room again. Drywall is hung, taped, mudded, and primed. Then the flooring and cabinet sequence begins — and the order here matters more than most homeowners expect.
Flooring Sequence Depends on Material
The flooring-before-or-after-cabinets debate has a real answer that depends on material. Hardwood and floating luxury vinyl plank (LVP) should be installed before cabinets to allow for natural expansion. Tile, however, is typically installed after cabinets are set, because tile under cabinetry is wasted material and adds unnecessary height variability. Confirm the approach with your installer before ordering.
Cabinets go in after drywall is primed but before finish painting. Why? Cabinet installers need to fasten into studs through the drywall, and painters will touch up around the installed cabinets rather than paint behind them. Upper cabinets are installed before lower cabinets to avoid working over a finished base.
Create a Shared Trade Schedule
Use a simple shared document or calendar to confirm each trade's start date, duration, and the milestone that must be complete before they arrive. Share it with every contractor involved. This single habit prevents the most common scheduling conflicts — like a drywaller showing up before the electrician has finished rough-in.
Once cabinets are fully installed and leveled, the countertop fabricator can template. Stone and engineered quartz countertops require an in-person template visit — this cannot happen from drawings alone. Fabrication then takes approximately two weeks, so schedule the template appointment the day cabinets are completed.
Phase 5: Finish Work and Final Inspections
The final phase brings everything together. The sequence within finish work follows a clear logic: complete the messy tasks before the precise ones.
- Countertop installation — follows cabinet set and template fabrication
- Backsplash tile — installed after countertops so tile can be cut to the counter surface
- Finish painting — after tile, to paint over any grout haze or touch-up areas
- Plumbing trim-out — faucets, sink, and garbage disposal are installed after countertops are set
- Electrical trim-out — outlets, switch plates, and light fixtures are installed and connected
- Appliance installation — dishwasher, range, refrigerator, and hood are set in place last
- Final inspection — a municipal inspector confirms all permitted work meets code before the project is closed out
Hardware, cabinet pulls, and any remaining punch-list items close the project after final inspection. For seasonal styling ideas once your kitchen is complete, a room-by-room décor checklist can help you finish the space with intention.
A remodel done in the right order is rarely the fastest — but it is almost always the least expensive overall. Build the schedule deliberately, communicate it clearly with every trade, and protect each phase milestone before the next one begins.